A Simple Checklist To Keep My Website Consistent?

Creating a website is an exciting step, but keeping it consistent is what ensures your visitors trust your site and return time and again.  Being consistent means visitors will be ‘comfortable’ within your site because they know they will be led smoothly through to find the information they need. 

Consistency helps you build a professional image, making it easier for people to navigate and engage with your content. To help you maintain this consistency, I’ve created a simple checklist that’s easy to follow and will make a big difference to your online presence.

Why Consistency Matters

Consistency isn’t just about making your site look nice – it’s about building trust and making sure your audience knows what to expect.

Whether it’s through the design, tone of voice, or how often you post, consistency shows that you’re serious about your website and your audience.

Let’s dive into the checklist to keep everything on track.

Website consistency

1. Maintain a Clear Visual Identity

Your website’s design should have a unified look across all its pages. Use this mini-checklist to keep things visually consistent:

  • Logo: Use the same logo and size across your website.
  • Colours: Choose a colour palette (2-3 main colours) and stick to it.
  • Fonts: Pick 1-2 fonts for headings and body text and use them throughout.
  • Images: Ensure your images are high quality, the same size, and match your website’s style.

💡 Tip: Tools like Canva can help you create professional-looking graphics to align with your brand.

2. Write in a Consistent Tone of Voice

Your tone of voice is how your audience hears you in their minds. To maintain consistency:

  • Identify your tone: Is it formal, friendly, or conversational?
  • Stick to it: Write all your blog posts, product descriptions, and updates in the same tone.
  • Be clear: Avoid jargon and make your content easy to understand.

3. Structure Your Content Uniformly

Make it easy for your audience to navigate by keeping the structure of your pages consistent:

  • Headers: Use headings and subheadings (e.g., H1, H2, H3) in the same format on every page.
  • Paragraphs: Keep your paragraphs short and scannable (2-3 sentences each).
  • Call-to-Action (CTA): End your posts with a consistent CTA (e.g., “Check out my latest guide!”).

4. Regularly Update Your Content

Outdated content can harm your credibility. Use this mini-checklist to stay up to date:

  • Review old posts: Check for broken links and update any outdated information.
  • Post regularly: Aim for a schedule you can manage, whether it’s weekly or monthly.
  • Refresh visuals: Swap out old images or graphics with updated versions.

5. Optimise for Mobile and Desktop

Your website needs to look and function well on all devices. Ensure:

  • Responsive design: Your site adapts seamlessly to phones, tablets, and desktops.
  • Readable text: Fonts are clear and large enough to read on smaller screens.
  • Clickable buttons: Buttons are easy to tap without zooming.

6. Monitor Your Website’s Performance

A slow or broken website can frustrate visitors. Keep your site running smoothly with these checks:

  • Test load speed: Use tools like Google PageSpeed Insights to check your site’s speed.
  • Fix broken links: Check for broken or outdated links and update them.
  • Run regular backups: Save a backup of your site in case anything goes wrong.

7. Stay Consistent with Branding

Branding is more than just your logo or colours. It’s how people recognise you. To maintain your brand:

  • Tagline: Display your tagline prominently across your site.
  • Social media links: Use the same branding on your social profiles.
  • About page: Regularly update your About page to reflect your goals and story.

8. Engage with Your Audience

Consistency isn’t just about visuals or content – it’s about interaction too:

  • Reply to comments: Answer questions or comments on your blog posts promptly.
  • Email responses: Keep your responses professional and timely.
  • Social media: Post content and updates that align with your website’s tone and values.

And Finally...

Keeping your website consistent might feel like one more thing to think about, but it’s a small effort with big rewards.

When your website looks professional, functions smoothly, and reflects your brand, it becomes a space that visitors trust and return to.

Use this checklist regularly, and over time, maintaining consistency will become second nature.

If you need extra guidance, platforms like Wealthy Affiliate offer tools and support to help you along the way.

Website consistency checklist

Here’s a little transparency: My website contains affiliate links. This means if you click and make a purchase, I may receive a small commission. Don’t worry, there’s no extra cost to you. It’s a simple way you can support my mission to bring you quality content.

What Is SiteGround Hosting About?

What Is SiteGround Hosting About?

If you’re looking to start a website but feel completely lost in the world of online jargon, you’re not alone. Setting up a website might sound complicated, but trust me, it doesn’t have to be. Today, I’m going to walk you through one of the most beginner-friendly hosting services available—SiteGround Hosting. By the end of this article, you’ll have a good understanding of what SiteGround is and why it’s such a great option for beginners.

Siteground review

What Is Hosting and Why Do You Need It?

Before diving into SiteGround, let’s take a step back and talk about hosting. Think of a website as your home on the internet. For that home to exist, it needs land to sit on—that’s what hosting provides. Hosting is the service that stores your website’s files and makes it available for people to see online.

What Is SiteGround Hosting?

SiteGround is a hosting provider that helps people create and run websites without needing a technical background. It’s known for being easy to use, reliable, and offering excellent customer support—all of which are essential when you’re starting out.

Some hosting companies can feel like they’re designed for tech experts, but SiteGround has been built with beginners in mind. They offer everything you need to get started, and they explain things clearly so you’re not left scratching your head.

Why Is SiteGround a Good Choice for Beginners?

Here are some reasons why SiteGround stands out for beginners:

  1. Simple Set-Up Process
    Setting up a website with SiteGround is incredibly straightforward. Once you sign up, you can install WordPress—a popular tool for building websites—with just a few clicks. This takes away the stress of having to figure it all out yourself.
  2. Fast and Reliable
    Nobody likes a slow website. SiteGround makes sure your website loads quickly and stays online. This is especially important if you’re setting up a business website or blog and want visitors to have a good experience.
  3. Amazing Support
    When you’re starting out, having someone to turn to when things go wrong can be a lifesaver. SiteGround’s support team is available 24/7 to help you via chat, phone, or email. They’re friendly, knowledgeable, and patient—exactly what you need when you’re new to this.
  4. Affordable Plans
    SiteGround offers reasonably priced plans that include everything you need to get started. You won’t feel overwhelmed by extras you don’t need, and you can always upgrade later as your website grows.

The Downside

SiteGround is a fantastic hosting provider for beginners, but it does come with some downsides. Its renewal prices are significantly higher than the introductory rates, and storage is limited on entry-level plans.

Unlike some competitors, it doesn’t include a free domain, and resource usage on shared hosting is capped, which could be an issue for growing websites. Additionally, SiteGround typically requires upfront payment for a year or more, with no monthly billing on most plans.

While its pricing may be higher compared to other beginner-friendly hosts, its ease of use, speed, and excellent customer support often outweigh these drawbacks for many users.

How to Get Started with SiteGround

  1. Visit the SiteGround website.
  2. Choose a hosting plan (their StartUp plan is perfect for beginners).
  3. Follow the prompts to set up your account and install WordPress.
  4. Start creating your website—don’t worry, it’s much easier than you think!

SiteGround’s dashboard is intuitive and gives you everything you need to manage your website, from domain names to email accounts.

And Finally...

Starting a website can feel overwhelming, but with the right tools, it’s absolutely achievable. SiteGround Hosting is a fantastic place to begin your journey. It’s user-friendly, reliable, and backed by excellent support—exactly what you need when you’re starting out.

Take it one step at a time, and before you know it, you’ll have your website up and running. Whether it’s for a blog, a business, or an online shop, SiteGround can help make your vision a reality. Remember, the most important thing is to start. Once you take that first step, the rest will follow.

Here’s a little transparency: My website contains affiliate links. This means if you click and make a purchase, I may receive a small commission. Don’t worry, there’s no extra cost to you. It’s a simple way you can support my mission to bring you quality content.

How To Come Up With Enough Content For Your Website

How To Come Up With Enough Content For Your Website

Coming up with enough content for your website might seem daunting at first, but with a clear plan and some straightforward strategies, you can ensure you never run out of ideas.

Whether you’re just starting or looking to expand your content library, I’ll guide you through easy steps to keep your website fresh and engaging.

1. Start with Your Audience

The most important part of creating content is knowing who you’re writing for. Think about the people who will visit your website:

  • What problems do they have?
  • What questions are they asking?
  • What interests or hobbies do they share?

Take time to jot down everything your audience might need help with or want to learn about. This list will serve as a foundation for you as you come up with enough content ideas.

enough content ideas

2. Use Your Own Knowledge and Experience

You know more than you think you do. Write about your personal experiences, insights, or tips that relate to your business or niche. Even a small piece of advice can be valuable to someone who’s just starting out.

If you’re not sure where to begin, think about the most common questions people ask you about your topic. These make excellent starting points for content.

3. Research Your Topic

If you’re worried that your knowledge might not be enough, researching your niche can give you a wealth of ideas.

  • Look at what others in your field are writing about.
  • Use tools like Google’s autocomplete or the “People Also Ask” section to find common questions.
  • Explore forums and social media groups where your audience might hang out.

These resources can spark inspiration for topics you might not have considered.

Researching what your audience is asking gives you a goldmine of inspiration—and ensures you’ll always have enough content to work with.

4. Break Down Larger Topics

Sometimes, a broad topic can feel overwhelming. Break it down into smaller, more specific pieces. For example, instead of writing about “starting a business”, you could create separate articles like:

This approach not only gives you more content ideas but also makes your posts easier for readers to follow.

5. Use Tools to Help You Generate Enough Content Ideas

Tools to help with content ideas

There are simple tools you can use to find content ideas:

  • Answer the Public: This shows questions people are asking about your niche.
  • Ubersuggest: A free tool to find keywords and related topics.
  • Quora and Reddit: These platforms are full of real questions and conversations in almost every niche.

These tools are easy to use and can help you build a long list of potential topics.

6. Plan Ahead with a Content Calendar

A content calendar is simply a schedule of what you’ll write and when. Start by listing the key topics you want to cover each month. This will help you stay organised and reduce the pressure of last-minute writing.

You don’t need fancy software—a simple spreadsheet or notebook works just fine.  Use whatever works for you.

A content calendar gives you a visual overview, helps reduce overwhelm, and makes sure you’re planning enough content ahead of time.

7. Repurpose Existing Content

If you’ve already created some content, think about how you can repurpose it. For example:

  • Turn a blog post into a checklist or guide.
  • Expand a shorter post into a detailed article.
  • Use parts of your content for social media posts or emails.

This saves time and ensures you’re making the most of your work.

With a few simple strategies, you can consistently create enough content that informs, inspires, and keeps your audience coming back for more.

And Finally...

Creating content doesn’t have to be stressful or overwhelming. By focusing on your audience, breaking down topics, and using simple tools, you’ll always have ideas to work with. Take it step by step, and remember that the more you practise, the easier it gets.

Your website is a reflection of your unique voice and knowledge—trust yourself, and don’t be afraid to experiment with new ideas.

Feeling stuck for ideas happens to the best of us—but with a few simple strategies, you can create enough content that feels purposeful and sustainable. Stay curious, keep it simple, and remember: progress, not perfection, is what really matters.

What’s one topic your audience keeps asking about? Drop it in the comments—I’ll help you turn it into a post!

Here’s a little transparency: My website contains affiliate links. This means if you click and make a purchase, I may receive a small commission. Don’t worry, there’s no extra cost to you. It’s a simple way you can support my mission to bring you quality content.

What Is Godaddy Hosting About?

What Is Godaddy Hosting About?

Creating a website might feel overwhelming, especially if you’re just starting out. There’s so much jargon and so many options that it’s easy to feel stuck. But don’t worry—I’m here to walk you through it. One of the easiest ways to get started is by using GoDaddy Hosting, a platform designed to help people like you take their first steps online.

Let’s break it down so you can feel confident about building your website and moving closer to your online goals.

Godaddy

What is Hosting, and Why Do You Need It?

Before we get started into GoDaddy, let’s quickly cover the basics of hosting.

A website is essentially a collection of files and data that need to be stored somewhere so people can access them online. Hosting is like renting a virtual space to keep your website available 24/7.

Think of it as your website’s home on the internet.

Without hosting, your website wouldn’t exist online, no matter how beautifully you’ve designed it.

Why Choose GoDaddy Hosting?

GoDaddy is one of the most beginner-friendly hosting platforms. It’s known for its simplicity, affordability, and reliability—perfect for someone with no prior experience. Here are a few reasons why GoDaddy hosting might be a good fit for you:

  1. Easy-to-Use Tools
    GoDaddy provides an intuitive dashboard and user-friendly tools that make it easy to set up your website, even if you’ve never done this before.
  2. Affordable Plans
    They offer hosting packages to suit a range of budgets, so you can start small and upgrade as your website grows.
  3. 24/7 Support
    If you get stuck, there’s always someone to help. GoDaddy’s support team can guide you through any challenges.
  4. All-in-One Solution
    GoDaddy isn’t just for hosting; it also offers domain registration and website-building tools. You can manage everything in one place, which makes it much less confusing.

How to Get Started with GoDaddy Hosting

Setting up with GoDaddy is simple—just follow these steps and you’ll be up and running in no time.

  1. Choose a Hosting Plan
    Go to the GoDaddy website and browse their hosting options. For beginners, the basic shared hosting plan is usually the best place to start. It’s affordable and gives you everything you need to get online.
  2. Register a Domain Name
    A domain name is your website’s address, like www.getonlinestepbystep.com. GoDaddy makes it easy to search for and register a domain directly through their platform.
  3. Set Up Your Website
    Once you’ve chosen a hosting plan and domain, it’s time to build your website. GoDaddy has an integrated website builder, or you can install platforms like WordPress for more flexibility. Either way, the process is straightforward, and there are plenty of guides to help.
  4. Publish and Grow
    After creating your website, you’ll be ready to publish it for the world to see. As you grow, you can explore advanced features like email marketing and SEO. This is where platforms like Wealthy Affiliate can complement your journey, offering further training and tools to optimise your site for success.

And Finally…

Setting up a website doesn’t have to be daunting, and GoDaddy Hosting can be your gateway to a new online adventure. By taking small, manageable steps, you can go from having no online presence to creating something meaningful for your business or passion project.

Remember, every successful website starts with someone who was willing to try. You don’t need to know everything to get started—you just need the right tools and a willingness to learn. GoDaddy Hosting makes it easy to take that first step, and before long, you’ll be ready to explore more advanced strategies and resources.

Your online journey begins with action. Why not take that first step today?

Have you tried GoDaddy before, or are you exploring hosting options for the first time? Drop a comment below—I’d love to hear where you’re at!

Here’s a little transparency: My website contains affiliate links. This means if you click and make a purchase, I may receive a small commission. Don’t worry, there’s no extra cost to you. It’s a simple way you can support my mission to bring you quality content.

The Key to Online Success

The Key to Online Success

Starting your online journey can feel like stepping into a foreign world full of jargon, tools, and strategies you’ve never heard of. But here’s the truth: you don’t need to be an expert to succeed online. You just need to start with the basics, take small, consistent steps, baby steps and stay focused on your goals.

In this guide, I’ll gently walk you through the key to online success—from building your first website to attracting your first visitors.

Step 1: Understand What “Online Success” Really Means

Before diving into the technical stuff, take a moment to reflect. What does success mean to you? For many, online success involves:

  • Earning a Steady Income: Whether it’s a side hustle or a full-time business, income gives you security and independence.
  • Building a Community: Connecting with people who share your interests or value your expertise.
  • Freedom and Flexibility: The ability to work on your own terms, from anywhere.

Success looks different for everyone, but the key to online success is starting with a clear idea of what it means to you.  It’s not aout perfection or getting it right immediately. It’s about progress—each small win builds toward something greater.

the key to online success

Step 2: Start with the Basics

Getting started online doesn’t require expensive tools or advanced knowledge. These three foundational steps will set you up for success:

1. Choose Your Niche

A niche is the specific topic or area your website will focus on. Think about:

  • Your Passions: What do you enjoy doing or learning about?
  • Your Skills: Do you have knowledge or experience others would find useful?
  • Your Audience’s Needs: What problems can you solve for people?

Example: If you love gardening, your niche could be “gardening tips for small spaces.”

2. Pick a Domain Name

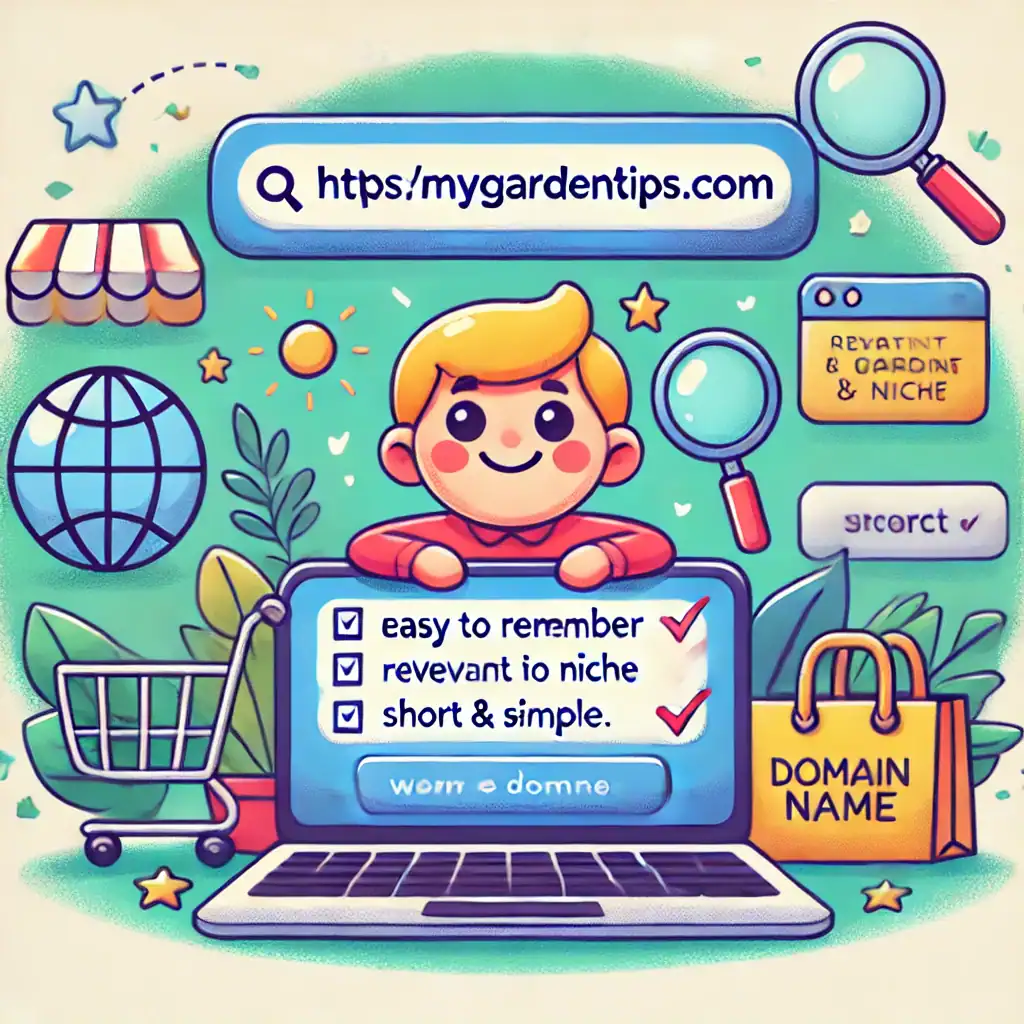
Pick a domain name

Your domain name is your website’s address (like www.SmallSpaceGardening.com). A good domain name is:

  • Easy to remember.
  • Relevant to your niche.
  • Short and simple (avoid long phrases or hard-to-spell words).

You can purchase domain names through services like Namecheap or Wealthy Affiliate’s domain tool.

3. Get Hosting

Hosting is like renting space for your website. It’s where all your content and files live. For beginners, choose a hosting provider that:

  • Offers simple, beginner-friendly tools.
  • Includes customer support to help you if you’re stuck.

Wealthy Affiliate’s hosting service is a great option for those starting out, as it’s designed with beginners in mind.  Or have a look a SiteGround.  It’s really wherever you feel happy.

Step 3: Build Your First Website

Wealthy Affiliate Starter membership

You don’t need to be a tech genius to create a professional-looking website. With today’s tools, anyone can do it. Here’s how:

1. Choose a Website Builder

Platforms like WordPress are ideal for beginners. They’re easy to use, customizable, and have plenty of free resources to help you learn. This website you are looking is a WordPress site and at Wealthy Affiliate there are so many training courses to help you through as well as a dynamic community.

2. Select a Template

Templates (or themes) determine how your website looks. Choose one that is:

  • Clean and simple.
  • Easy to navigate.
  • Mobile-friendly (so it works on phones and tablets).

3. Add Key Pages

Start with these essential pages:

  • Home Page: A welcoming introduction to your website.
  • About Page: Share your story and explain what your website is about.
  • Contact Page: Provide ways for visitors to get in touch with you.

Step 4: Create Content That Helps People

Content is what makes your website valuable. It’s the articles, videos, or resources that attract visitors and keep them coming back. Start with:

1. Blog Posts

Write about topics your audience cares about. For example, if your niche is gardening, you could write a blog post titled, “5 Tips for Growing Herbs Indoors.”

2. FAQs

Answer common questions in your niche. This builds trust and shows you understand your audience’s needs.

3. Visual Content

Add photos or videos to make your content more engaging. If you’re camera-shy, tools like Canva let you create graphics without being an artist.

Step 5: Attract Visitors (Traffic) to Your Website

Once your website is live, you’ll want people to visit. Here are three simple ways to get started:

1. Use SEO (Search Engine Optimization)

SEO helps your website show up in search engines like Google. Don’t worry—it’s not as complicated as it sounds. Focus on:

  • Using Keywords: These are words or phrases your audience searches for (like “how to grow herbs indoors”).
  • Writing Descriptive Titles: Your blog post title should clearly explain what the post is about.
Attracting visitors to your website

2. Leverage Social Media

Share your content on platforms like Facebook, Pinterest, or Instagram. You don’t need to be on every platform—just pick one or two where your audience is active.

3. Word of Mouth

Tell friends, family, and coworkers about your website. They can help spread the word.

Step 6: Build Trust with Your Audience

Building trust takes time, but it’s essential for success. Here’s how to start:

  • Be Authentic: Share your story and connect with your audience honestly.
  • Deliver Value: Focus on helping your audience solve problems or achieve their goals.
  • Engage: Reply to comments or emails and show your audience you care.

Step 7: Stay Committed and Keep Learning

Online success is a journey, not a sprint. Here’s how to keep going when the road gets tough:

  • Set Small Goals: Celebrate milestones, like publishing your first blog post or getting your first visitor.
  • Learn as You Go: Platforms like Wealthy Affiliate offer step-by-step training for beginners.
  • Stay Consistent: Even if progress is slow at first, keep showing up and putting in the effort.

Consistency, curiosity, and courage are part of the key to online success, especially when you’re learning as you go.

And Finally…

The key to online success is simpler than it sounds: start small, stay consistent, and keep learning as you go. You’re building something real, one step at a time—and that’s worth celebrating.  With every new skill you learn, you’ll get closer to your goals.

So take that first step—set up your website, create your first piece of content, or simply start exploring your niche. Success is within your reach, and you’re capable of achieving it.

What does “online success” mean to you? I’d love to know—pop a comment below and let’s chat about it!

If you have questions or need extra help, you’re not alone. Reach out, join a community, and keep moving forward. Your future starts now! 

Here’s a little transparency: My website contains affiliate links. This means if you click and make a purchase, I may receive a small commission. Don’t worry, there’s no extra cost to you. It’s a simple way you can support my mission to bring you quality content.