How to Use the Search Bar: A Gentle Beginner’s Guide

How to Use the Search Bar: A Gentle Beginner’s Guide

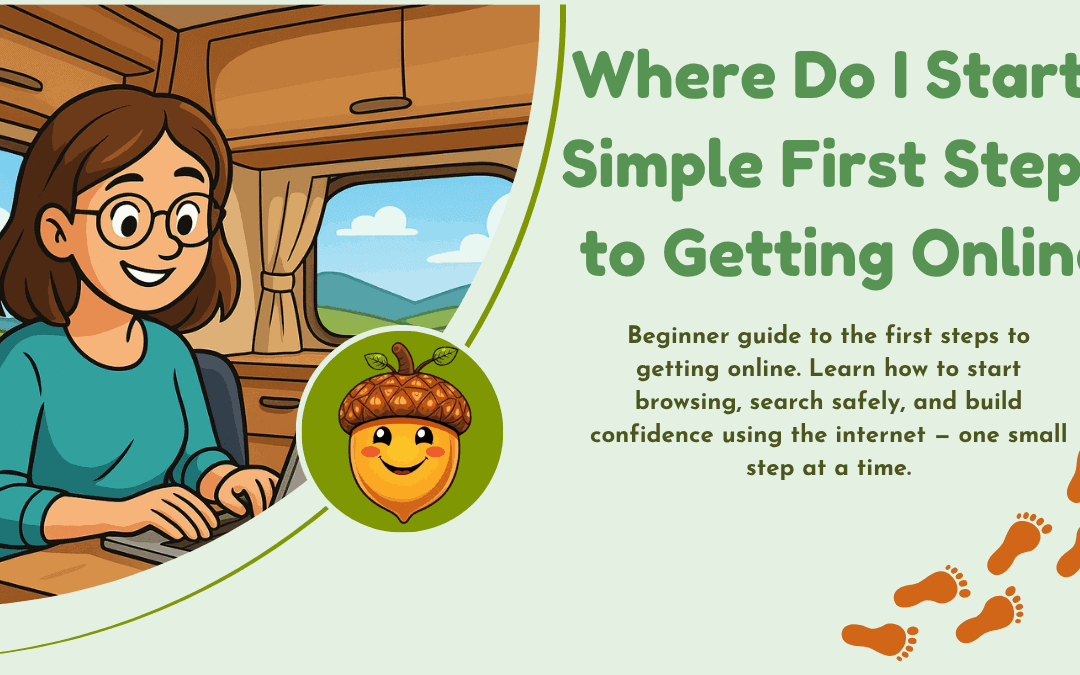
If you’re brand-new to being online, learning how to use the search bar can feel confusing — and that’s completely okay. Nobody starts out knowing how the internet works. Every confident computer user began right where you are: curious, unsure, and taking one small step at a time.

Have you ever wondered how people find things online, like gardening ideas or a lovely coffee shop nearby?
The answer is simple: they use the search bar, a small box on your screen that helps you ask questions and explore information.

Today, we’re going to learn how to use the search bar gently, calmly, and without rushing.

You don’t have to get everything right. You don’t need to be fast.
One curious click at a time is enough.

What Is the Search Bar?

Before we learn how to use the search bar, let’s understand what it is.

The search bar is a little box — usually at the top of your internet browser — where you type what you want to find. Think of it like asking a friendly librarian a question. Instead of whispering, you type your question or topic.

You might see text inside the box like:

  • Search…

  • Type here to search

It simply means: “Tell me what you’re looking for.”

That’s it — no secret tricks, no complicated steps.

A colourful search bar|how to use the search bar

How to Use the Search Bar (Step by Step)

Now we’ll learn how to use the search bar in the simplest way possible.

Step 1: Find the search bar

Look near the top of your screen. You’ll see a long rectangle or box.
That’s your search bar.

Step 2: Click inside it

Just one gentle click. You’ll see the cursor (the little blinking line) appear.

Step 3: Type something small and simple

Try something you enjoy or are curious about. For example:

easy gardening tips

You don’t need long sentences — just a few words works wonderfully.

Step 4: Search

Press Enter on your keyboard or click the magnifying glass icon
(the tiny picture that means “search”).

Congratulations — you just used the search bar!

Try It Yourself — You Can Do This

Let’s take a calm little practice moment.

When you feel ready, try this:

Click inside the search bar
Type: easy gardening tips 

Press Enter

Go on — you won’t break anything.
You’re simply asking the internet a question.

And remember: if you look at the results and think
“Wow, that’s a lot!” — that’s normal.

Pause. Breathe. Look at just one result.
Learning how to use the search bar is a gentle process.

Why Using the Search Bar Matters

Knowing how to use the search bar opens up a world of possibilities:

  • Finding recipes

  • Checking weather

  • Learning hobbies

  • Finding local places

  • Looking up health information (from trusted sites)

It’s like having a helpful guide right on your screen.

Helpful Beginner Resources

If you’d like to explore a little more, these beginner-friendly guides are helpful:

Top Tips For staying Secure Online

Google Search Basics (Official Guide)

How To Search Google With Confidence

Both are safe, simple, and written for ordinary users — not tech experts!

And Finally...

Whether you typed your first words today or simply read through quietly, you made progress.

Truly.

Learning how to use the search bar isn’t about speed — it’s about taking small steps that build confidence.

And you’re doing that beautifully.

Take your time.
Be gentle with yourself.
You’re learning — and learning is a brave thing.

When you’re ready, try typing something else into the search bar:

  • how to grow herbs indoors

  • best walks near me

  • simple soup recipes

Every little search makes you stronger online.

You’ve got this — one gentle click at a time.

Where Do I Start? Simple First Steps to Getting Online

Where Do I Start? Simple First Steps to Getting Online

If you’re brand new to the online world, you might be thinking: “Where do I even begin?”

You’re not alone — and you don’t need to feel embarrassed or overwhelmed. Everybody starts somewhere, and learning the internet is just like learning anything else in life: one small step at a time.

Today, we’re taking those first steps to getting online gently, clearly, and without any jargon. No rushing, no pressure. You don’t have to know everything at once — just enough to feel comfortable and curious.

Ready? Let’s take this journey together.

Why Getting Online Matters — In Everyday Life

The internet isn’t just for tech-experts or young people. It’s now part of everyday life, and being online can help you with things like:

  • Staying in touch with family and friends

  • Finding information (recipes, health advice, travel tips)

  • Shopping safely and comparing prices

  • Learning new skills and hobbies

  • Managing appointments and accounts

  • Starting a business or exploring new opportunities

Taking your first steps to getting online is not just about technology — it’s about confidence, independence, and staying connected in a fast-moving world.

And the good news? You can learn at your own pace.

First Steps to Getting Online: What You Actually Need

Before you begin, you only need three basic things:

  1. A device — like a laptop, desktop, tablet, or smartphone

  2. An internet connection — usually broadband or Wi-Fi

  3. A web browser — like Chrome, Edge, Safari, or Firefox

That’s it. No fancy gadgets. No expensive setup.
Just simple tools that help you explore the digital world safely.

If you’re unsure which device to start with, here’s a gentle tip:
A laptop or computer is usually easier for beginners because the screen is bigger and typing feels simpler.

Simple first steps to getting online

Getting Comfortable With Your Web Browser

Think of your browser as your door to the internet. You open it to explore websites, search for information, and learn new things.

When you take your first steps to getting online, it’s helpful to get familiar with:

  • The address bar (where website names go)

  • The search bar (where you ask questions, like “how to make scones”)

  • The back button (your safety net — if you go somewhere by accident, just go back)

  • The tabs (to have more than one page open at once)

Take a moment here. Open your browser and try typing in:

bbc.co.uk


or

google.com


That’s your first real step — and you’ve already done it.

Learning to Search: Your Digital Superpower

A search engine like Google is where you type questions. Think of it like asking a helpful librarian who never sleeps.

Try simple searches to start, such as:

  • How to boil an egg

  • Weather in my area

  • Chair yoga for beginners

  • Local coffee shops

When learning your first steps to getting online, don’t worry about “getting it wrong.”
The internet is a place for experimenting and discovering — not perfection.

Digital super power

Staying Safe From the Beginning

Safety online matters — especially for beginners. Here are gentle safety habits to build from day one:

  • Don’t share personal info unless you trust the site

  • Use strong passwords (or a notebook to store them at first)

  • Look for the padlock symbol in the browser to know a site is secure

  • If something looks odd or too good to be true, pause before clicking

Online safety should feel empowering — not frightening. With a little awareness, you’re already protecting yourself.

If you’re curious to learn more about staying safe online, this beginner-friendly guide is excellent:
Get Safe Online

Taking Your Time Is Not a Weakness — It’s Wisdom

Some people seem to zip through technology like they were born with it. But your journey doesn’t need to look like theirs.

In fact, taking small, steady steps builds lasting confidence.

Here’s a gentle way to practice:

  1. Open your browser

  2. Search something you enjoy

  3. Click a link and read slowly

  4. Practice going back and forth between pages

Celebrate each tiny win. Every click is progress.

Next Steps When You’re Feeling Ready

As you take your first steps to getting online, you might soon want to explore:

  • Setting up an email address
  • Joining a beginner-friendly Facebook group
  • Learning how to watch videos on YouTube
  • Bookmarking favourite sites

And when you feel even braver — building your own website or online presence.
(Just imagine that!)

You’re Doing Better Than You Think

If you’ve read this far, you’ve already started. Truly.
You’ve learned the basics and taken your first steps to getting online — gently, patiently, confidently.

You don’t need to hurry.
You don’t need to compare yourself to anyone else.

Just keep exploring — one click at a time.

Building a step at a time

And Finally...

What tiny online task would you like to learn next?

  • Setting up email?

  • Searching recipes?

  • Watching tutorials?

  • Understanding links and buttons?

  • Learning keyboard shortcuts?

Tell me in the comments — I’m right here beside you, every step of the way.

Learning to Get Online Takes Time

Learning to Get Online Takes Time

When you’re first learning to get online, it’s easy to look around and feel like everyone else already knows what they’re doing. Maybe you see people managing websites, posting confidently on social media, or joining online groups with ease. Meanwhile, you might feel unsure, anxious, or even a little embarrassed to be starting from scratch.

If that’s you — I want you to know something right away:

There is no shame in being a beginner.

We are all beginners at something, and learning to get online is simply another skill that grows with practice, patience, and gentle guidance.

Learning to get online

Life has recently reminded me that moving slowly is okay. We don’t always have the energy to push hard or learn everything at once — and that’s true whether you’re grieving, healing, busy, or simply overwhelmed. So in this season, I’m simplifying things. I’ll be sharing smaller, step-by-step lessons that help you move forward one tiny bit at a time.

And tiny steps are enough. Truly.

Why Learning to Get Online Feels Overwhelming

Many beginners tell me the same thing:

“I don’t even know where to start.”

The online world can feel like a different language:

  • Buttons everywhere

  • Settings you’ve never seen before

  • Websites asking for passwords

  • New apps with icons you don’t recognize

You’re not confused because you’re “bad with technology.”
You’re confused because no one taught you yet.

If you’ve never been shown something, how could you possibly know how to do it? This is why learning to get online requires patience and a gentle step-by-step approach — not rushing, not comparing yourself to others, and definitely not giving up.

Simple Steps for Learning to Get Online

Let’s bring the focus back to simplicity.

You don’t need to learn everything all at once. In fact, you’ll learn quicker if you do less at a time, not more.

Here’s a practical approach you can try:

Step 1: Choose One Small Goal

Examples:

Do not try to learn multiple things at once.
Small goals lead to confidence.

Step 2: Repeat the Same Skill Several Times

Repetition is your friend.
It transforms “I don’t get it” into “Oh, I remember this.”

If you can:

  • Watch the same video again
  • Practice the same click pattern
  • Say the steps out loud

You’ll build your confidence much faster.

Step 3: Allow Mistakes — They’re Part of Learning

Mistakes don’t mean failure.
Mistakes mean you’re trying.

If something goes wrong:

  • Pause

  • Breathe

  • Try again slowly

Your brain likes repetition. Give it time to settle in.

You’re Not Behind — You’re Learning

People sometimes worry that they are “too slow” or “too old” to learn new technology.

But here’s the truth:

You are not behind. You are learning at your pace, which is exactly the right pace for you.

Everyone learns differently. Some people need to see things. Some need to hear instructions. Some learn best by doing. There is nothing wrong with the way you learn — you just need space, patience, and support.

If today all you learn is:

  • How to open a browser

  • How to type into a search bar

  • Or how to click something with confidence

That is real progress.

Learning at your own pace | learning to get online

How I’m Moving Forward With You

As I’ve shared, I’m moving slowly at the moment too. Life brought some emotional issues which it does sometimes doesn’t it?  I’m taking time to heal while still showing up in a gentle and steady way.

That’s why I’ll be posting:

  • One lesson at a time

  • Shorter and simpler tutorials

  • Clear step-by-step instructions

Not rushed.
Not overwhelming.
Just enough to help you keep going.

And we’ll walk this path together — step by step.

A Gentle Encouragement for You

You don’t have to understand everything today.

You don’t have to be confident yet.

You just have to keep going.

Learning to get online is a journey — and you’re already on the path.
And I’m right here walking it with you.

Tell me in the comments:

What is one small thing you would like to learn next?
It can be as simple as:

  • How to copy and paste

  • How to search for recipes online

  • How to make a password

  • How to save a photo

Your question will help me choose our next lesson.

You are doing better than you think.
Let’s keep going — one small, steady step at a time.

Here’s a little transparency: My website contains affiliate links. This means if you click and make a purchase, I may receive a small commission. Don’t worry, there’s no extra cost to you. It’s a simple way you can support my mission to bring you quality content.

6 Simple Ways to Make Your Website Look More Professional

6 Simple Ways to Make Your Website Look More Professional

Creating a website is exciting — but if you’ve ever looked at your pages and thought, “It just doesn’t look quite right,” you’re definitely not alone.
The good news? You don’t need a designer, a big budget, or a brand-new theme to make your website look more professional.

You just need a few simple tweaks that help visitors feel comfortable exploring what you do.

Let’s walk through them one step at a time.

1. Keep It Clean and Simple

A clean, simple design isn’t just easier on the eyes — it’s one of the biggest secrets behind professional-looking websites. When everything feels calm and organised, visitors can find what they’re looking for without any effort.

Whitespace (or “empty” space) is your best friend here. It’s not wasted space — it helps important things stand out.
When your text, images, and buttons have room to breathe, your site instantly looks tidier and easier to read.

Make Your Website Look More Professional | Squint

Try doing this:  Open your homepage and squint a little. If it feels crowded or “busy,” you may need more space between sections or less text in one place.

2. Choose Colours That Work Together

Colours can change how people feel about your site. Soft, balanced tones create a calm and trustworthy atmosphere; too many bright or clashing colours can feel overwhelming.

Start with two or three complementary shades and stick to them throughout your site — one for headings, one for links or accents, and one neutral background colour.

Think of it like decorating a room: fewer, well-chosen colours create harmony.

If you want your site to feel warm and friendly, try muted blues, greens, or soft neutrals. You don’t need neon buttons to get attention — clarity always beats noise when you want to make your website look more professional.

3. Pick Fonts That Are Easy to Read

Fonts are the quiet heroes of your design. A fancy script might look fun, but if your reader has to squint, they’ll give up before they finish a sentence.

Choose one main font for your text and one for your headings — that’s it.
Stick with simple, readable options like Arial, Lato, or Open Sans.

Consistency helps make your website look more professional because visitors notice patterns more than design rules. When everything feels tidy and predictable, they relax — and stay longer.

How To Add A Menu To Your Website | easy to read Horizontal Menu

4. Write Clear, Honest Content

No matter how pretty a site looks, your words are what build trust.

Your content should sound like you — clear, friendly, and easy to follow. Keep sentences short. Use subheadings to break things up. And always write as if you’re talking to one person, not an audience of thousands.

High-quality, genuine content makes your website look more professional because it reflects care and confidence.

If writing feels overwhelming, start with one page at a time:

  • Your homepage: who you are and how you help

  • Your About page: your story and what you stand for

  • Your Blog: practical, simple advice your audience can act on

Tip: Use at least one clear image per page. A relevant photo or illustration helps people feel at ease and adds visual interest.

5. Focus on Function: Easy Navigation and Speed

A website isn’t just what people see — it’s how it feels to use.

Your visitors should find what they need quickly. Keep your top menu simple:
Home | About | Blog | Contact

If someone gets lost, they’ll leave — not because they don’t like your content, but because they couldn’t find it.

Speed also matters. Large images or too many plugins can slow things down, especially on mobile phones. Compress your images in Canva or TinyPNG and test your site on your phone — does it load within a few seconds?

Making your site easy to use is one of the fastest ways to make your website look more professional — it shows respect for your visitor’s time.

6. Add Small Personal Touches

Professional doesn’t mean cold or corporate.
Your visitors want to feel that there’s a real person behind the screen.

Add a friendly photo of yourself, a calm colour palette that reflects your personality, or a short welcome message on your homepage. These small touches make a big difference.

Think of your site as a friendly workspace — neat, approachable, and authentically yours.

And Finally...

Which part of your website (or mine) do you think could look more polished — your layout, your colours, or your writing?
Share your thoughts or questions in the comments below — you might inspire someone else who’s just starting their own refresh!

Here’s a little transparency: My website contains affiliate links. This means if you click and make a purchase, I may receive a small commission. Don’t worry, there’s no extra cost to you. It’s a simple way you can support my mission to bring you quality content.

How to Choose a Website Name That People Remember

How to Choose a Website Name That People Remember

Creating your own website is exciting — but if you’ve ever sat staring at a blank screen wondering what on earth to call it, you’re definitely not alone.

Choosing a name can feel a bit like naming a pet or even a child — it’s something you’ll live with for years, so it needs to feel right. The good news is, you don’t need marketing jargon or a big brainstorming session.
You just need a clear process — and a calm mindset.

Let’s walk through how to choose a website name that feels comfortable, makes sense to your audience, and is easy to remember.

How to choose a website name

Step 1: Know Who You’re Naming It For

Before you start juggling potential website names, it helps to know who you’re aiming to connect with.

Think about the kinds of people you want to visit your site.
      Are they midlife learners dipping their toes into online business?
      Small business owners?
      Creative hobbyists?

Knowing your audience makes your naming decisions simpler and more meaningful.

You might be wondering why this matters. Well, the right name resonates with your readers and makes them feel that you’ve designed your space for them.

For example, a playful name might appeal to a younger crowd, while a steady, plain-English name feels more reassuring to professionals or older audiences who prefer clarity.

To understand your readers better, notice where they spend time online — perhaps in Facebook groups, forums, or communities around shared interests. You could even run a short survey to ask what types of names feel trustworthy to them.

When your website name fits the world they live in, they’re far more likely to remember it. It’s about speaking their language — even before they read a single post.

Think about well-known names like TechCrunch or BuzzFeed. You instantly know the type of audience they’re for — and that’s the power of choosing the right name.

Step 2: The Art of Simplicity — Crafting a Name That Sticks

When you’re learning how to choose a website name, simplicity is your best friend.

A short, clear name is easier to spell, say, and share. In a fast-paced online world, that matters.

Try focusing on brevity. Ask yourself:

“Could someone type this easily without asking me to spell it?”

If not, it’s probably too complicated.

Simple names can be powerful

Think of names like Netflix or Instagram — short, descriptive, and memorable.
They work because they convey meaning and sound natural.

In your case, simplicity might look like:

  • “Calm Crafting”

  • “Home Office Helper”

  • “Step by Step Websites”

They’re easy to say and give a sense of what you do without fuss.

The trick is to balance simplicity with personality. Don’t lose what makes your site unique just to be short. A clear name that reflects you will always win over something that’s trendy but confusing.

How to choose a website name | clarity

Step 3: Make Sure It Reflects What You Actually Do

Your visitors should be able to guess roughly what your site is about — even before they click.

If you teach, guide, or review products, hint at that in your name.
For example, Get Online Step by Step works because it instantly signals what kind of help readers will get.

When brainstorming, write down a few words that describe:

  • What you help people with

  • The tone you want (friendly, calm, expert, or playful)

  • The feeling you want to create (trust, curiosity, excitement, simplicity)

Then, combine one word from each column until something clicks.

Step 4: Check Availability Early

Before you fall in love with a name, make sure it’s not already taken as a domain name.
You can check availability easily using Namecheap or 123 Reg.

If your exact choice is taken, don’t panic — try small variations:

  • Add “online,” “guide,” or “by [YourName]”
  • Use a different domain ending (like .co.uk instead of .com)

Keeping your domain simple and tidy will make it easier for people to find and share your site.

Step 5: Add a Touch of Originality

The internet is crowded, so a little creativity can help you stand out.
But originality doesn’t mean overcomplicating things.

Think about wordplay or gentle puns that relate to your topic — just enough to spark curiosity.
A name like Grindstone Glories might suit a business blog, balancing hustle with optimism.

How to choose a website name | originality

The key is to make sure your name still gives a clue about what your site offers.
If it’s too mysterious, people won’t know what they’re clicking on — and search engines won’t either.

Keep SEO in mind: if possible, include a relevant word in your name, such as “crafts,” “blog,” “lessons,” or “wellness.” That helps both people and Google understand your focus.

Step 6: Say It Out Loud

Finally, test it with a friend or family member.
If they immediately understand what your site’s about and can repeat it back easily, you’re onto something good.

If they look puzzled or need you to spell it — it might be worth simplifying.

And Finally…

Learning how to choose a website name is less about perfection and more about connection.
It’s not about being clever — it’s about being clear.

Your website name should:

  • Feel natural when you say it
  • Make sense to your readers
  • Hint at your topic or purpose
  • Be easy to spell, type, and remember

Start simple, test it out, and remember: your name isn’t carved in stone.
What matters most is that it feels like you — friendly, human, and approachable.

For more information read this post

Over to You…
Have you found it tricky to name your website, or did the right idea come to you straight away? I’d love to hear what you’ve chosen — or what you’re still thinking about. Share your ideas or questions in the comments below. Your thoughts might just help someone else who’s stuck on the same step.

Here’s a little transparency: My website contains affiliate links. This means if you click and make a purchase, I may receive a small commission. Don’t worry, there’s no extra cost to you. It’s a simple way you can support my mission to bring you quality content.